Monday, March 31, 2014

Craft Room Reveal

I think I finally finished my Craft Room or at least I am happy so far, but like all women I will change it again.  Somewhere down the road I will get tired of something or what I thought was organized will not work for me, but for now I am in love with the new colors and all the storage I have. 

Hope you enjoy my pics.  I just could not wait to share.  I wanted a craft room that could have the doors left open in the house.  I like that is a useful craft room, but one that I will enjoy sharing with someone. 

This first pics are the before and after views from the entry door.


BEFORE                                                                 


AFTER


This first area has to be on of my favorites in the entire room.  This my embroidery area.
On the shelf above my work area are pictures of me and my daddy.  I only have these two and since I miss him everyday it is nice to have his pics close by in my craft room.  I do need some kind of cute poem or something for my chalk board.  If anyone has any suggestions please let me know.


I also
found the cutest pair of wooden scissors.  I saw someone on pinterest with a pair in their craft room and knew I had to find some.  Hobby Lobby of course.  I seem to be able to find anything there. 


I love these pics I found on the internet.  One is for my love of sewing and the other for my love of crocheting.  I think they turned out cute.

This area is my desk and this was my husband's when he was a child and I just could not part with it.  This thing has been moved, painted and been in so many different rooms in my house and has been an all around work horse.  I started removing some of the paint and I kinda like the rustic look of the top of it and I am not sure if I have decided to repaint or refinish.  


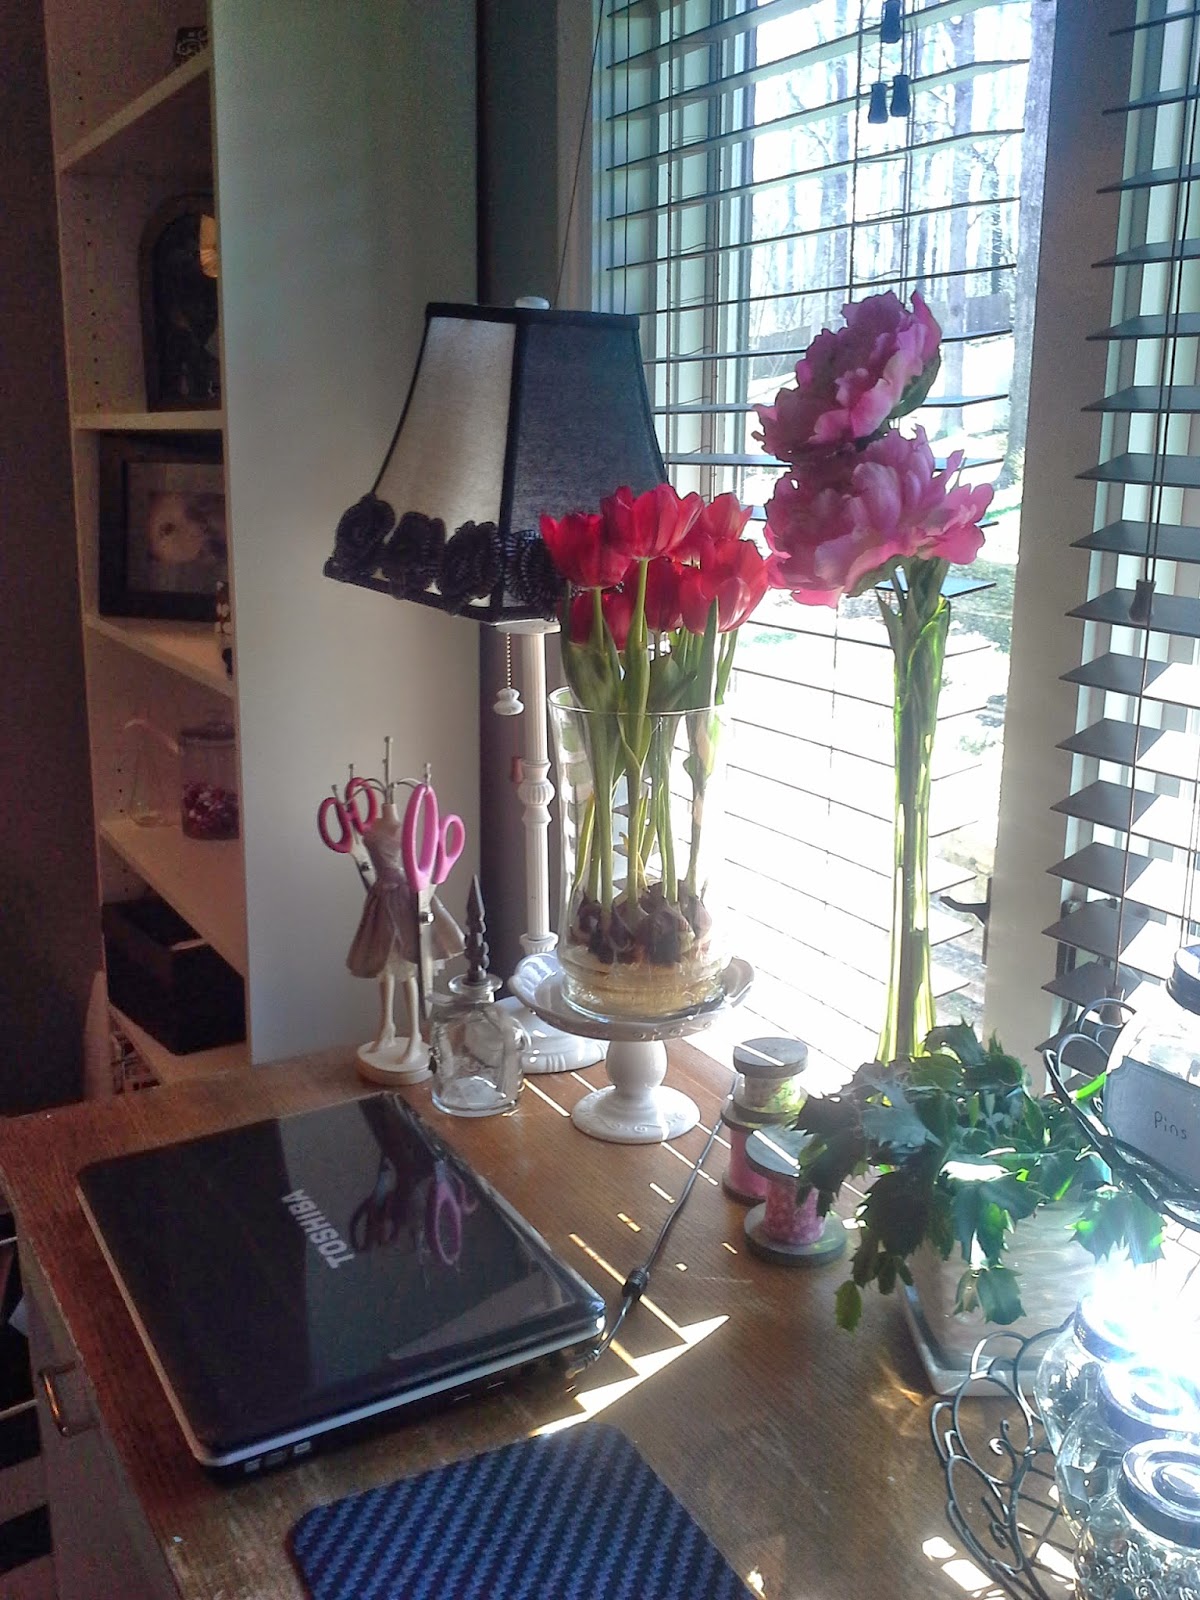
I added some "girly" stuff to the area... flowers!  They always make me feel good.  And, for some reason I have fallen in love with pink.  Hence the pink and gray color scheme!

.


I totally added lots of working areas in  my room and this one is for cutting fabric, gluing and what ever!

This is my sewing table and also holds my cricut machine (right there on the far right) barely in the pic, but it is finally out on a table where I can use it.  It used to be on a shelf and I had to drag it out to use it.  I live having stations where everything is available and ready to work!
SORRY FOR SO MANY PICTURES BUT I REALLY WANTED TO SHOW ALL OF MY ROOM.  I JUST LOVE IT THANKS TO PINTEREST FOR THE IDEAS.  I WOULD LIKE TO ADD SOME OF THE PRETTY THINGS, YET USEFUL THAT I INCORPARATED INTO MY ROOM. AFTERWARDS I WILL SHOW YOU SOME NEAT IDEAS YOU CAN USE IN YOUR CRAFT ROOM MAYBE  OR MAYBE THEY WILL INSPIRE YOU AS OTHERS HAVE INSPIRED ME!
This is an old desk top box I had at work for years and decided to take it home to use.
This is my great grandmothers last tatting work she was doing along with her old glasses, her needle and a rose.  I just had to have them in my craft room.  Also with this is an old sewing box.  I just need to find some old thread spools for the top and it will be perfect.
 
My jar of buttons that I must say I have had for 30 years maybe.  Bought them at a yard sale years ago for .50 cents.  I am so glad to be able to have them available when I need a button and they are such cute deco for a craft room.  Don't you think?
 
My fabric bins looked so blah so I thought I would add just a little decoration to them.  Gotta love Hobby Lobby for decoration.  I found just what I wanted.
My most favorite in the entire room is the birthday gift I received from my grandsons!  "Love them to the moon and back"
 
Like I mentioned before I just had to have some wooden scissors in my craft room.  So darn cute!


Have to admit that I do love my cute little form holding my scissors.  She is just so cute and goes nicely on my "girly" desk.


NOW THAT I HAVE SHOWN YOU MY WORKING AREAS AND MY DECORATIONS, I WANT TO SHARE SOME OF THE STORAGE I USED AND LOTS OF THE IDEAS I GOT FROM PERUSING PINTEREST. 
 
This is one thing I was so tickled to discover a use for.  My old Kuerig cup holder was going out to the trash until I thought it would work great to keep my embroidery floss in.  It works so good and keeps things neat and handy by my machine.
 

 I can not tell you how excited I was to find these cute little jars at Ikea.  They have made my life so much easier.  They hold all the little beads, brads and buttons for easy access.  Got to Love Ikea!


Like I said you gotta love Ikea and their storage systems!


I HAVE ENJOYED SHARING MY NEW CRAFT ROOM WITH YOU AND HOPE YOU HAVE ENJOYED IT.  I HOPE IT WAS A LITTLE INSPIRATION SOMEWHERE IN THESE POSTS.  PLEASE COMMENT AND LET ME KNOW WHAT YOU THINK!


Thursday, December 19, 2013

Christmas crafting Once Again!!!

Well we are at it again  The past couple of weekends and weeknights we have been busy getting ready for Christmas. 

                                                        This time to work on Santa shirts and......
                                                            gifts for a new baby.


  I also finally got my tree up and it matches my "Burlap" stockings.  Yes I just had to have a burlap tree.  My grandson, one of my daughters and I decorated the tree and had lots of fun doing it. 

Among shirts, baby gifts and decorating we worked on bows for my granddaughter......
 
 
stockings and more stockings for some friends and for Kate's boys.

 
We have been quiet adventurous!
Check out my Project page to see our newest crafts, (SHHHH! Christmas presents) that we are working on and trying to finish.  Hope my son in law does not look at my blog!


Monday, November 18, 2013

Sunday Crafting

Well we are at it again.  After 2 long hours in Hancock Fabrics and Joann's fabrics, we started crafting.  We still had Brody and Levi's shirts to make for Thanksgiving and since they were leaving in just a week for a long trip from SC to Michigan we made cute little Fleece car blankets for them.  They absolutely loved them. 


Brody is a teen age mutant ninja turtle fan so of course his was....


Teen Aged Mutant Ninja Turtles!!!!


Levi's we made a plaid (Daddy loves Plaid) with a soft minky on the back.  He loved the soft material.


We also made Brody and Levi Turkey shirts for their Thanksgiving at Grandma's house.


I also accomplished 2 beanies.  One for my grandson and one for a gift that Kate wants to give.


And, keeping with my burlap theme.... Kate made me the cutest burlap wreath. And, I got creative and tried to make some burlap rosettes!  First try was not so good, but I will try again.


All in All we were able to accomplish lots of things we had been looking forward to.  We have so many more ideas!  One idea is my new stockings.  I have 11 new ones to make and I'm so excited.  Keep watching I'm sure you will enjoy the pics.
 

Wednesday, November 13, 2013

Burlap Christmas Stockings

Amongst the list of things I want to make for myself for this holiday season; my friend asked me to make her and her family some stockings out of burlap.  Of course I said yes... now I just needed to think really hard about how I was going to make them!  I have made stockings before... not that great , but I have never made a stocking out of burlap before so to make it for someone else was a little unnerving.  But, as it turns out there are bunches of tutorials out there! Gosh, how I love Pinterest!  


My firend's gorgeous mantel displaying the stocking I made for her.  I think they are gorgeous with her beautiful Christmas decoaration.


And now for the first time on my blog I am going to try and walk you through making one like I did. Please bear with me I have never done this before, but I really want to start sharing crafts and the How Tos!

Materials:

1/2 yard Burlap
1/4 yard of cotton Plaid (or choice of fabric)
1 yard lightweight interfacing

Here is the pattern template

I started with burlap, a lightweight interfacing.   I cut two pieces of  the interfacing in opposite directions from pattern.


I then fused the interfacing onto the burlap.  Cut out two pieces of Burlap leaving a seam allowance. (You’ll be sewing along the edge of the interfacing.) You should have two pieces that look like this:


The next thing is to STOP NOW if you want to monogram.  Otherwise, once you’ve monogrammed/embellished/whatever your stocking, put burlap sides together. Sew leaving a seam allowance.  Turn inside out. Press Burlap stocking now using a cloth between iron and stocking. It should look like a burlap stocking now! 


Now is the time to add your cuff if you like.  For the cuff you need to cut a 11” x 14” section from fabric for cuff.  Or double the width of your finished stocking and add for seam allowance when you sew the short sides together. I added about 3/4" to 1".  Add interfacing to one half of the fabric and fold down. Note: (Now would be a good time to monogram or embellish cuff before sewing along short sides). Sew along short sides.


This should make a tube that looks like this:


Place cuff – right sides out into stocking. Pin to top edge of stocking with unfinished edge matching top of stocking. Sew these two together at top and press seams open. 


Pull cuff out, up, and over top edge of stocking. Press with iron using a cloth between your stocking and the iron. 


Voila! You just made a Christmas stocking to be proud of.